Overview
The RSL Editor is a visual interface for creating Really Simply Licensing (RSL) files that define how bots and AI agents can access your content. Instead of writing XML by hand, you use the editor to:- Define Content: Specify which parts of your site require licensing (URL patterns)
- Set License Terms: Configure permissions, restrictions, pricing, and legal terms
- Generate license.xml: The editor creates valid RSL XML automatically
- Publish: Deploy your license file to make it discoverable by bots
Accessing the RSL Editor
Navigate to Your Website
Within the merchant portal, go to Websites and click on the website you want to configure.
Editor Layout
The RSL Editor has three main areas: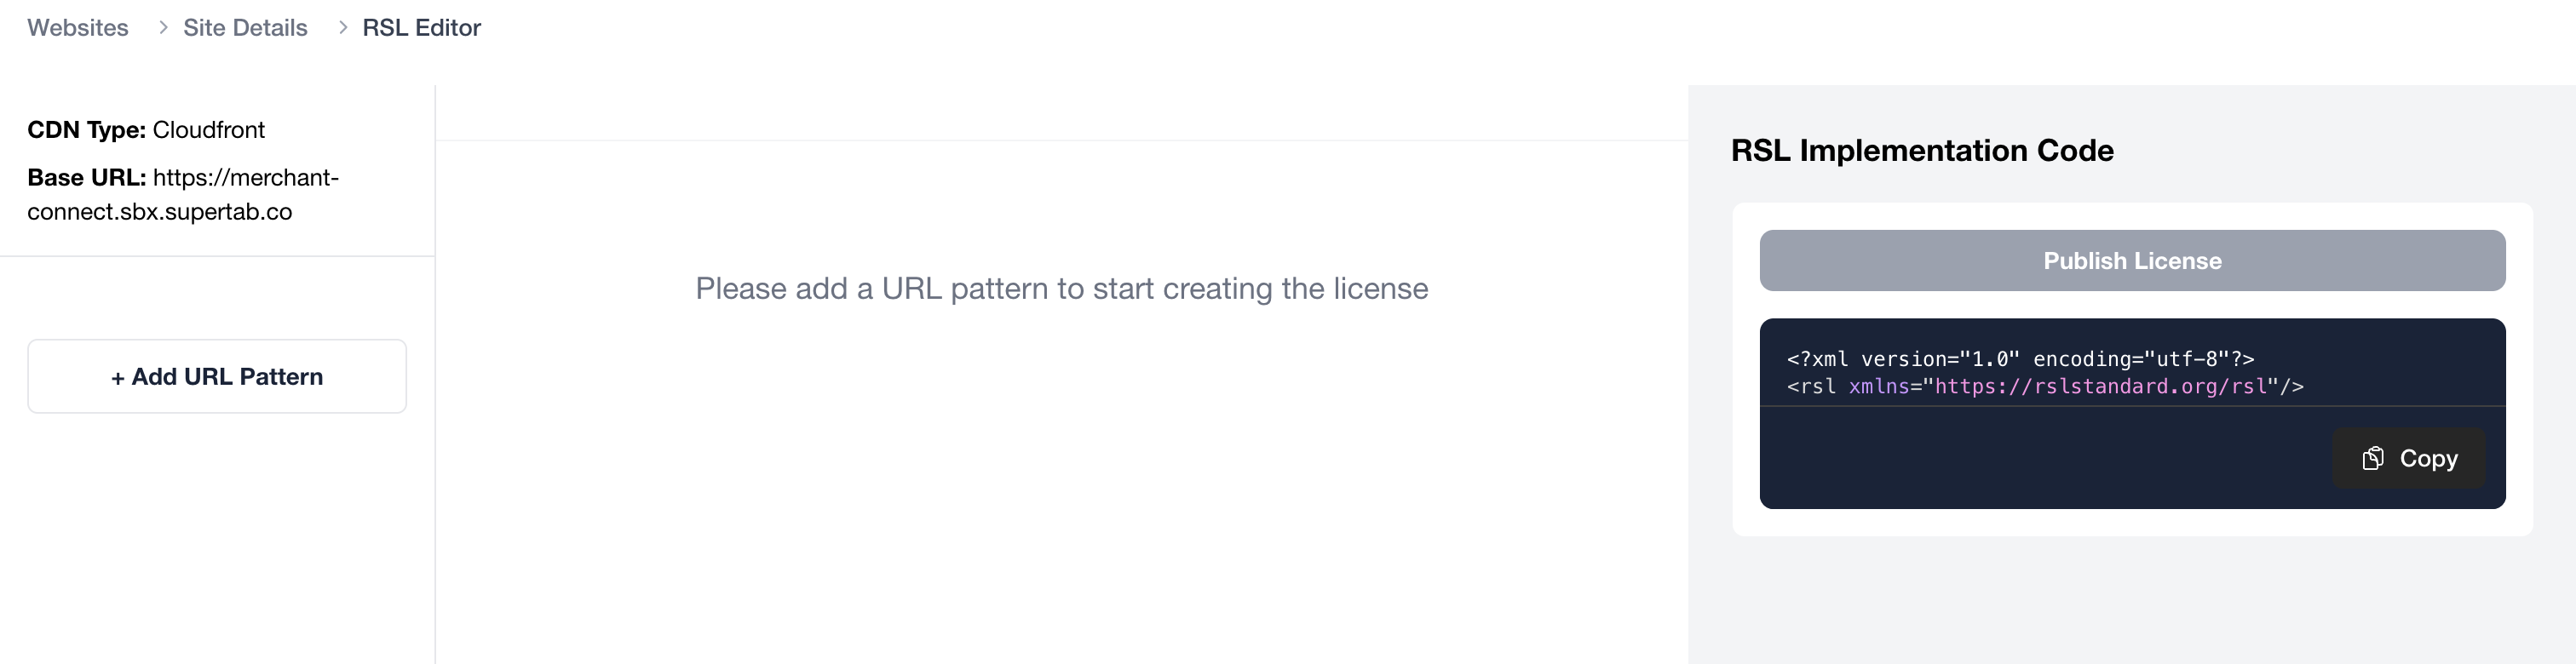
Left Sidebar: URL Patterns (Content)
Lists all Content definitions for this Website. Each entry represents a different section of your site that can have its own licensing terms. Example:https://example.com/*(entire site)https://example.com/news(just news section)https://example.com/sports(just sports section)
Center Panel: License Configuration
The main editing area where you configure:- Copyright & Terms: Copyright holder information and terms of service
- Licenses: Individual licenses with specific permissions and restrictions
Right Panel: Generated XML
Shows the RSL XML code that’s generated from your configuration in real-time. This is what gets saved as yourlicense.xml file.
Step 1: Define Your Content (URL Patterns)
First, you need to specify which parts of your site require licensing.Adding a URL Pattern
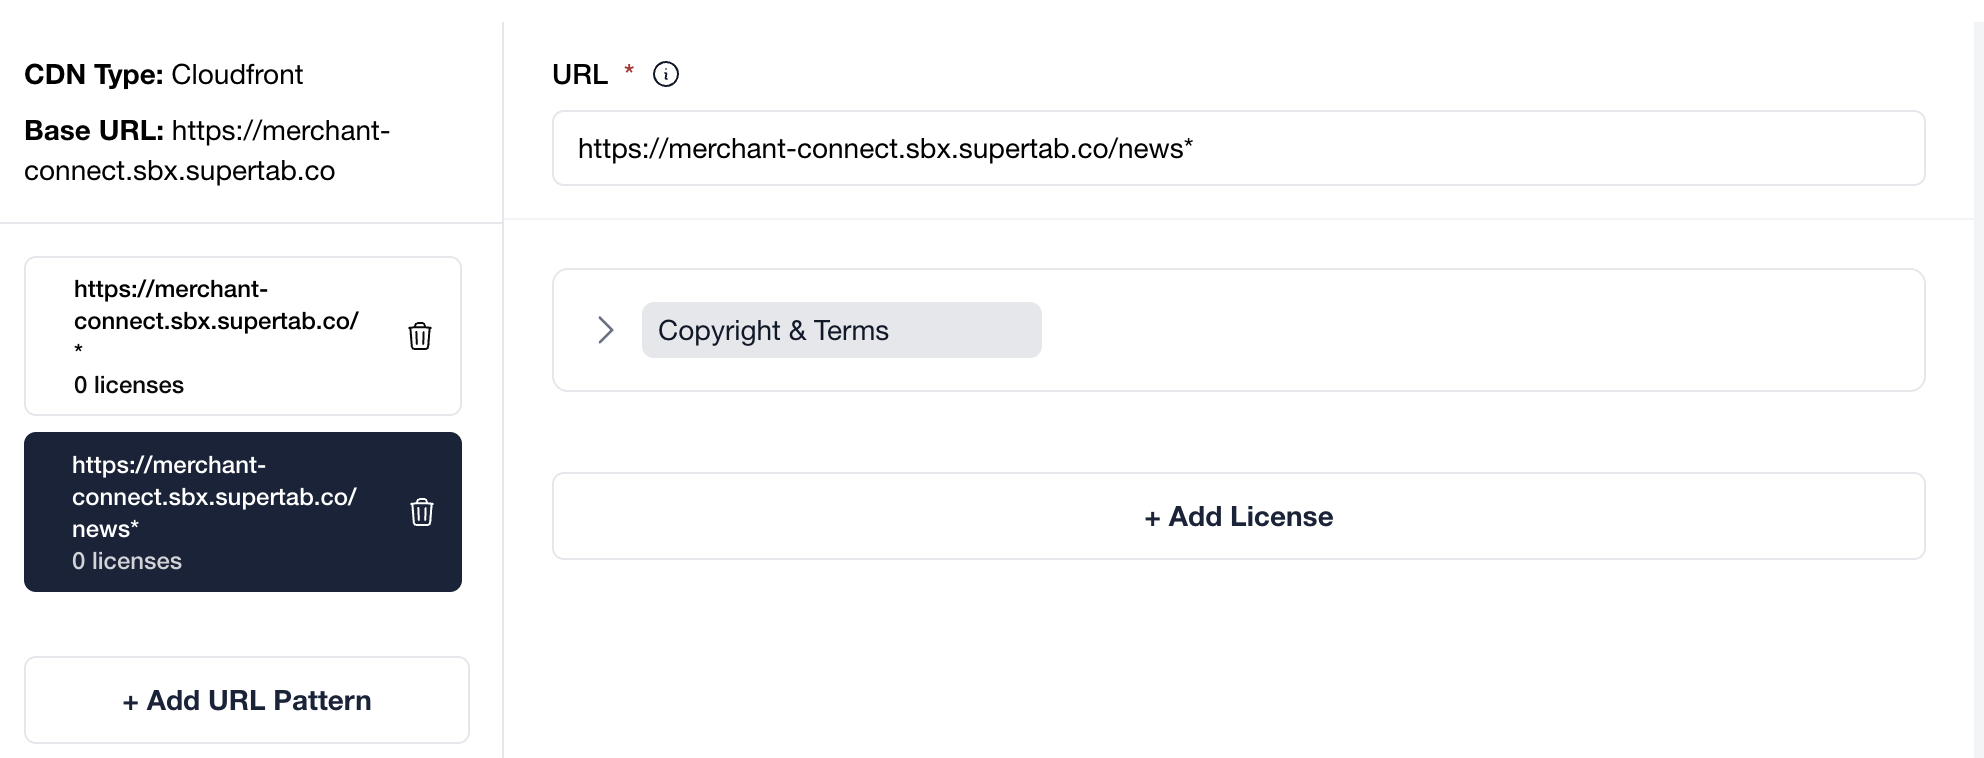
Enter the URL
Specify the content you want to license using URL patterns:Full URL patterns:
https://example.com/articles/*- All articleshttps://example.com/news- Just the news pagehttps://example.com/sports- Just the sports page
*matches any sequence of characters$matches the end of a path/articles/*matches/articles/2024/storyand/articles/tech/articles/$matches only/articles(exact match)
Step 2: Configure Copyright & Terms (Optional)
This section identifies who owns the content and where to find additional terms.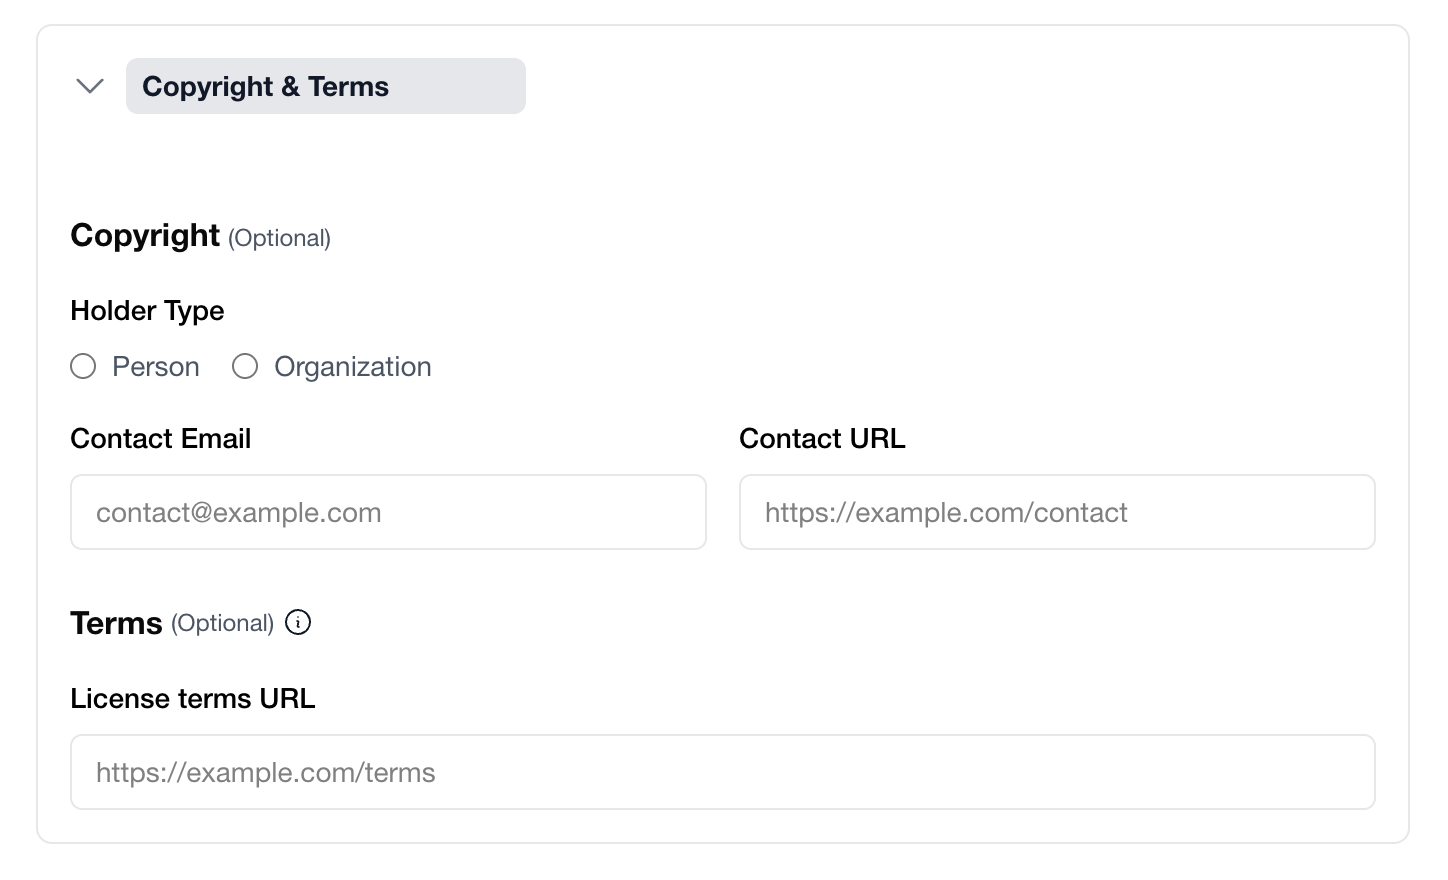
Copyright Information
Holder Type:- Person: For individual content creators
- Organization: For companies, publishers, or institutions
Example:
licensing@yourdomain.com
Contact URL:
Link to your contact page or form.Example:
https://yourdomain.com/contact
Terms
License terms URL: Link to a page with detailed legal terms and conditions.Example:
https://yourdomain.com/licensing-terms
Step 3: Create a License
Now you’ll define the actual licensing terms. Each URL pattern (Content) can have one or more Licenses with different terms for different use cases.Adding a License
Click '+ Add License'
Below the Copyright & Terms section, click + Add License.A new License section appears with three tabs: Permits, Prohibits, and Legal.
Permits Tab: What’s Allowed
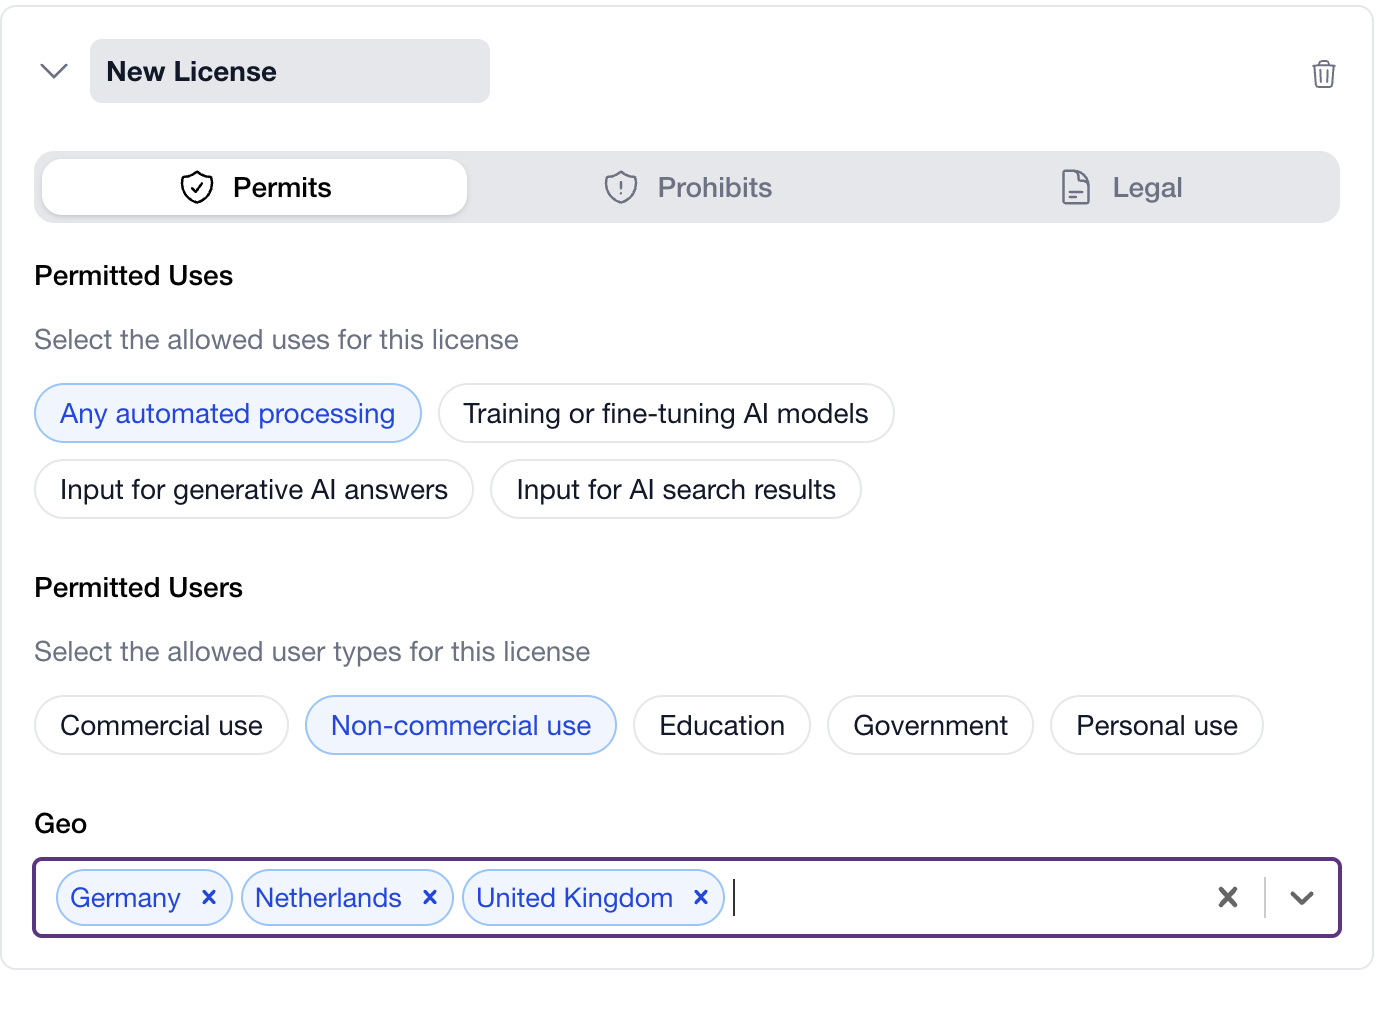
Permitted Uses
Select which types of automated processing are allowed:Any automated processing
Any automated processing
Allows all types of bot access, including AI training, search indexing, and generative AI use.Use this if: You want maximum bot access (most permissive).
Training or fine-tuning AI models
Training or fine-tuning AI models
Allows content to be used for training ai models.Use this if: You want to allow AI companies to train models on your content.
Input for generative AI answers
Input for generative AI answers
Allows content to be used as context for generating AI responses.Use this if: You want AI assistants to reference your content when answering questions.
Input for AI search results
Input for AI search results
Allows content to be indexed and used in AI-powered search engines.Use this if: You want AI search engines (Perplexity, SearchGPT) to include your content.
Permitted Users
Specify which types of users/organizations can use your content:- Commercial use: For-profit companies and commercial applications
- Non-commercial use: Non-profit organizations, research, personal projects
- Education: Schools, universities, educational institutions
- Government: Government agencies and public sector
- Personal use: Individual personal use only
Geo (Geographic Restrictions)
Optionally restrict which countries can access your content:- Leave blank: Available worldwide
- Select specific countries: Only accessible from those countries (ISO 3166-1 alpha-2 codes like US, EU, JP)
Prohibits Tab: What’s NOT Allowed
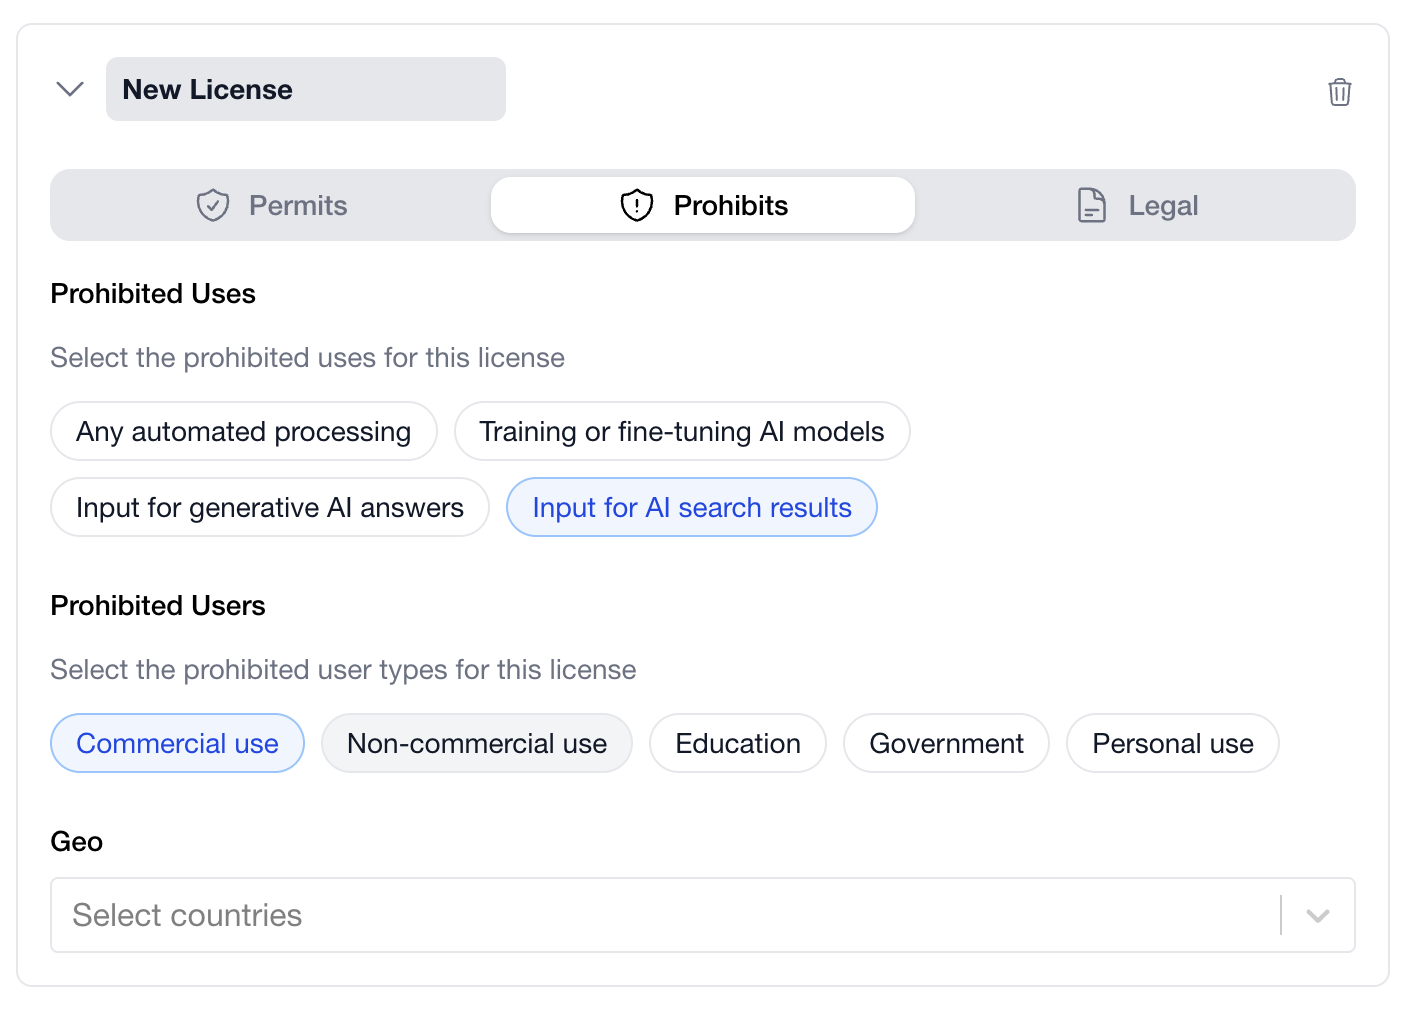
- To carve out exceptions from broad permissions
- To make restrictions explicit and clear
- To address specific concerns about how your content is used
- Permits: “Input for AI search results”
- Prohibits: “Training or fine-tuning AI models”
- Permits: All uses
- Prohibits (Geo): Select countries to block
Legal Tab: Warranties & Disclaimers
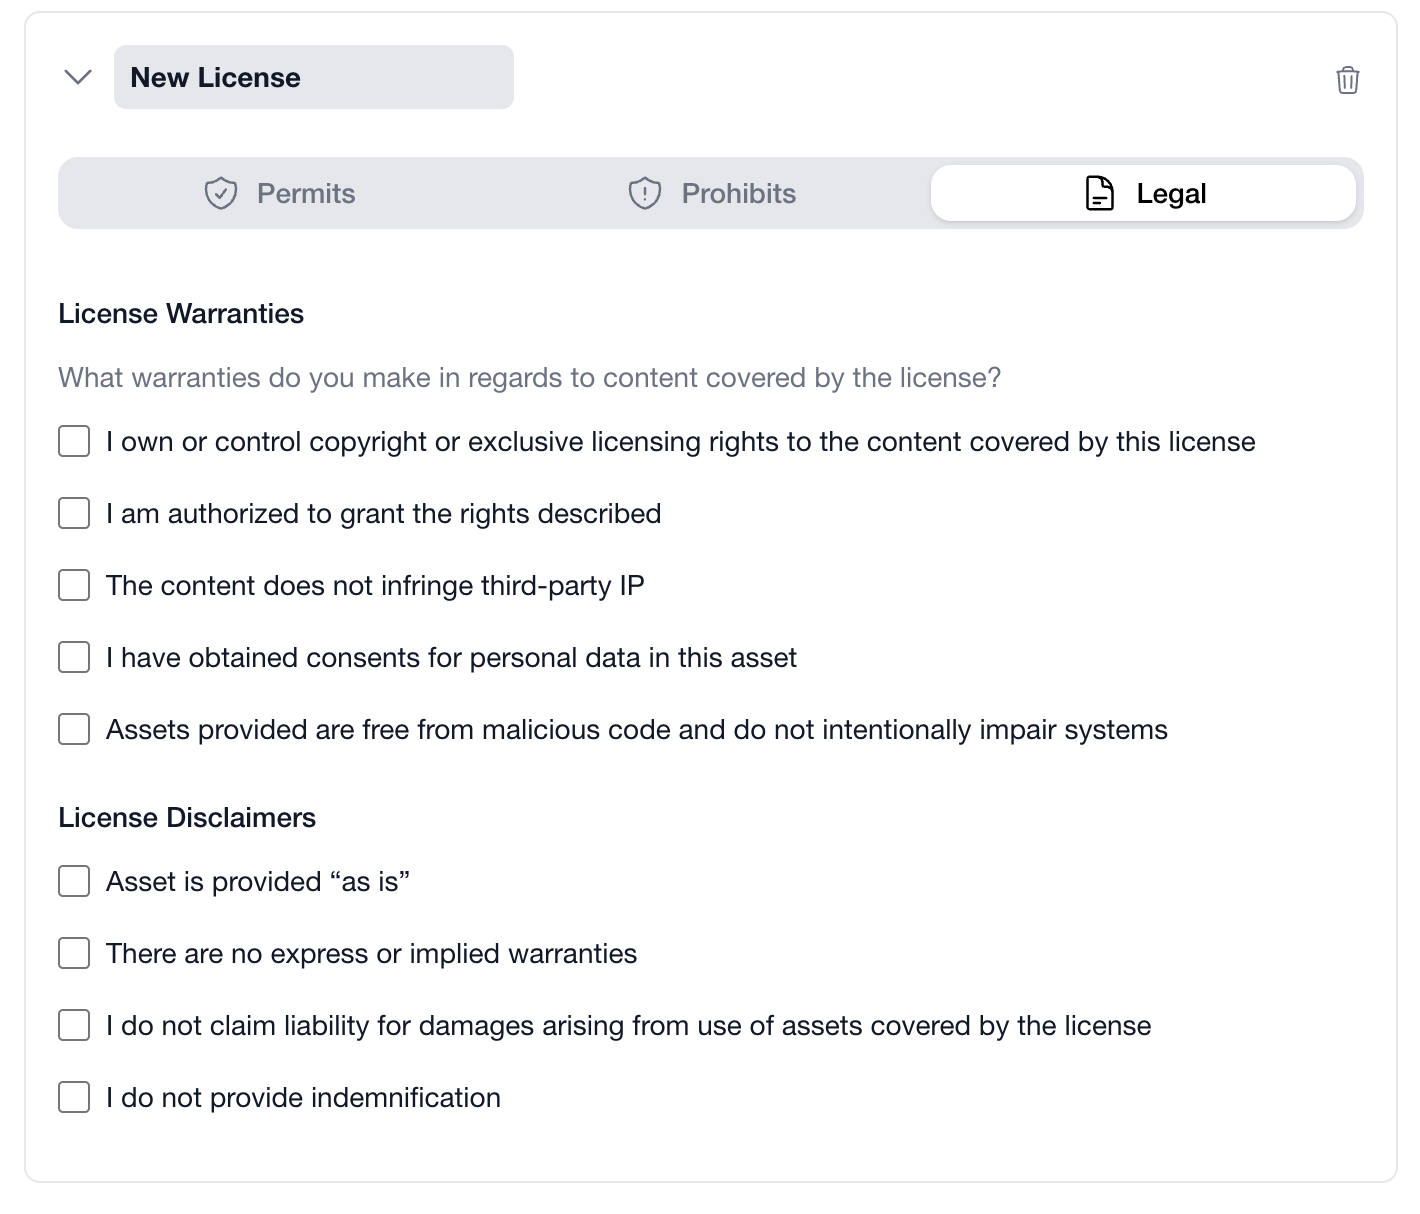
License Warranties
What warranties do you make in regards to content covered by the license? Check all that applyLicense Disclaimers
Select disclaimers to limit your liabilityStep 4: Review Generated XML
As you configure your license, the right panel shows the generated RSL XML in real-time.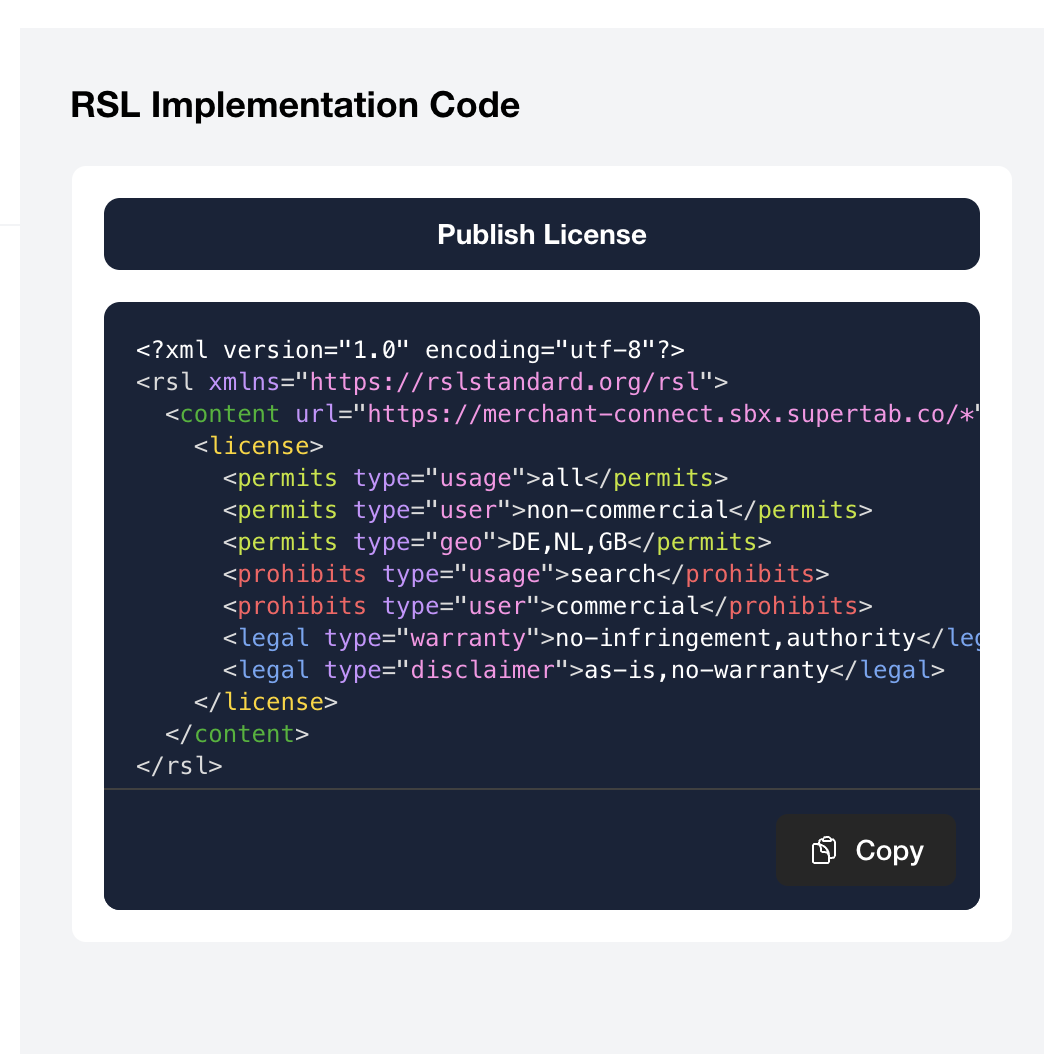
Step 5: Add Multiple Licenses (Optional)
You can create multiple licenses for the same content to offer different terms to different users.Why Multiple Licenses?
Example: Tiered Access License 1: Free Non-Commercial- Permits: Non-commercial use, Education, Personal use
- Payment: Free
- Permits: Commercial use
- Payment: $0.01 per page view
Adding Another License
- Click + Add License at the bottom
- Configure the new license (Permits, Prohibits, Legal)
- The XML updates to include both licenses
Step 6: Publish Your License
Once you’re satisfied with your license configuration, it’s time to make it available to bots.After publishing, you still need to update your
robots.txt file to point bots to your license. We’ll cover this in the next step.Next Steps
Now that you’ve created your RSL license, the next step is to publish it so bots can discover and respect your terms.Publishing Your License
Learn about automated and manual methods for making your license.xml file available at your domain.
What Happens Next?
After creating your license, you’ll:-
Publish the license.xml file (next step)
Make it available athttps://yourdomain.com/license.xml -
Update robots.txt
Add a License directive so bots can discover your terms
Additional Resources
- Understanding RSL - Learn about RSL elements and structure
- RSL Standard Specification - Official RSL documentation